Making Icon-nections: An inquiry into icons

As a technology integrator, I am constantly planning one activity or another on the iPads in an attempt to use them to enhance the curriculum. However, each time I go in to a classroom to teach, there is something that happens every single lesson:
"Ms. A, what do I do next?!?!"
Without fail, this phrase is yelled at me from across the room at least 10 times within one lesson and probably triple the amount when working in Kindergarten. The iPad is supposed to be an awesome tool that can unleash students' voices, but not when they can't figure out what to do with that tool.
I realized I was missing a huge piece to using iPads or technology with young children:
I wasn't teaching them how to "read" the tool.
We hand our students an iPad all the time at our school, but never have I actually given them strategies for figuring out what all the symbols and icons floating around the screen mean.
With this in mind, I started planning a lesson to begin teaching this process of how we navigate iPad apps. This post details one lesson that I did with Kindergarten and one lesson that I did in 2nd grade.
Kindergarten: Noticing and Making Connections

My goal for this lesson was to get students to begin to notice that icons on our iPads have a meaning and/or a function. These icons are clues to help us figure out what we can do with each app. I also wanted students to begin to notice patterns across apps. For example, the '+' symbol is commonly used to start a new project, new page, or add in a new element. Another common one is the 'sharrow' (share arrow) which can be found in almost any app in order to save, send, or share.
The Set Up
To get this lesson ready I found four apps on our Kindergarten iPads that had some common icons. I used:
On each table I laid out:
- 2 iPads with the app open and ready to go
- 1 big piece of paper (A3) with the app name in the middle
- 2 black markers
The Routine
I tried to create a routine for the students so that they had a process to think through. I introduced it by going through the process myself. Here is a chart that I made for the routine:
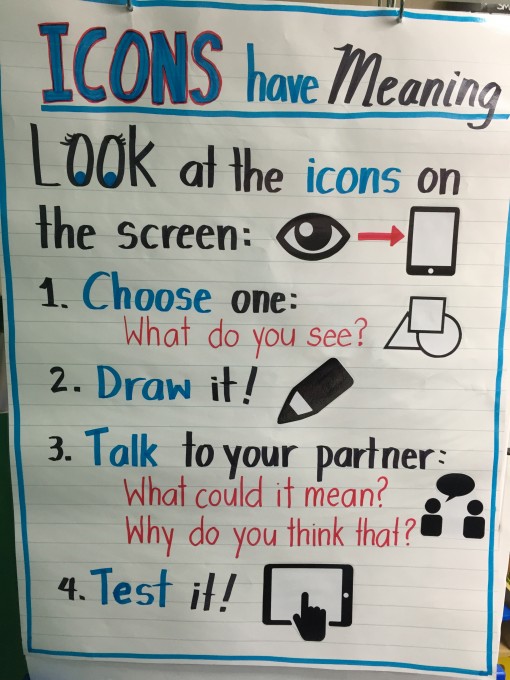
When I demonstrated the routine, I chose the sharrow as the icon I was noticing. I had the students help me discuss what shapes I could see within it. They made some very detailed observations considering there really isn't that much going on in most icons! Most students noticed the box, and compared it to a square or a rectangle. Many noticed the arrow but broke it up into further parts saying they saw a "half triangle at the top" and a "straight line going up and down." I drew it on a small whiteboard then I had the students do a turn and talk to answer the two questions on the chart:
- What could it mean?
- Why do you think that?
In most classes, one student was able to make a pretty close prediction, but there were also some other interesting answers:
"I think it means make something on the screen go up because the arrow is pointing up."
"I think it means sending a picture or something somewhere."
"Maybe it means make something come out because the arrow is coming out of the square."
At the end I showed them, that we can find out if our predictions were correct by doing a "Tap and Test"! So, I tapped on the sharrow and it brought up a list of words and buttons which I read to the students.
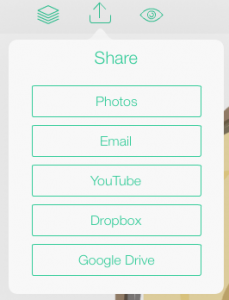
Most did not know what Dropbox or Google Drive was, but the first word, 'Share', was key as most noticed that it wasn't a button. Together we came to the conclusion it was like a title. We then decided the sharrow helped us to send our creations somewhere.
Rotation #1
At this point the students were given the chance to go to a table and work with their partner to go through the routine together. They collected the icons they were learning about by drawing them on the sheet of paper with the black marker provided on the table. With three teachers in the classroom, we were able to to basically have a teacher facilitate the discussion at each table for most of the time.
Rotation #2
During this transition, one of the teachers took all the black pens off the tables and replaced them with red ones. Students were then asked to rotate to a different table to investigate a different app. Before they touched their iPads or began the routine again I asked them to do something:
Let's make connections. Circle all of the icons you have seen already with the red marker.
Once they were done, they could then flip over their iPad and explore the icons in the second app. They added on to the paper using the red marker. This helped us to visually see which icons were found during which round.
Here is an example of all four papers from one class after the two rotations:
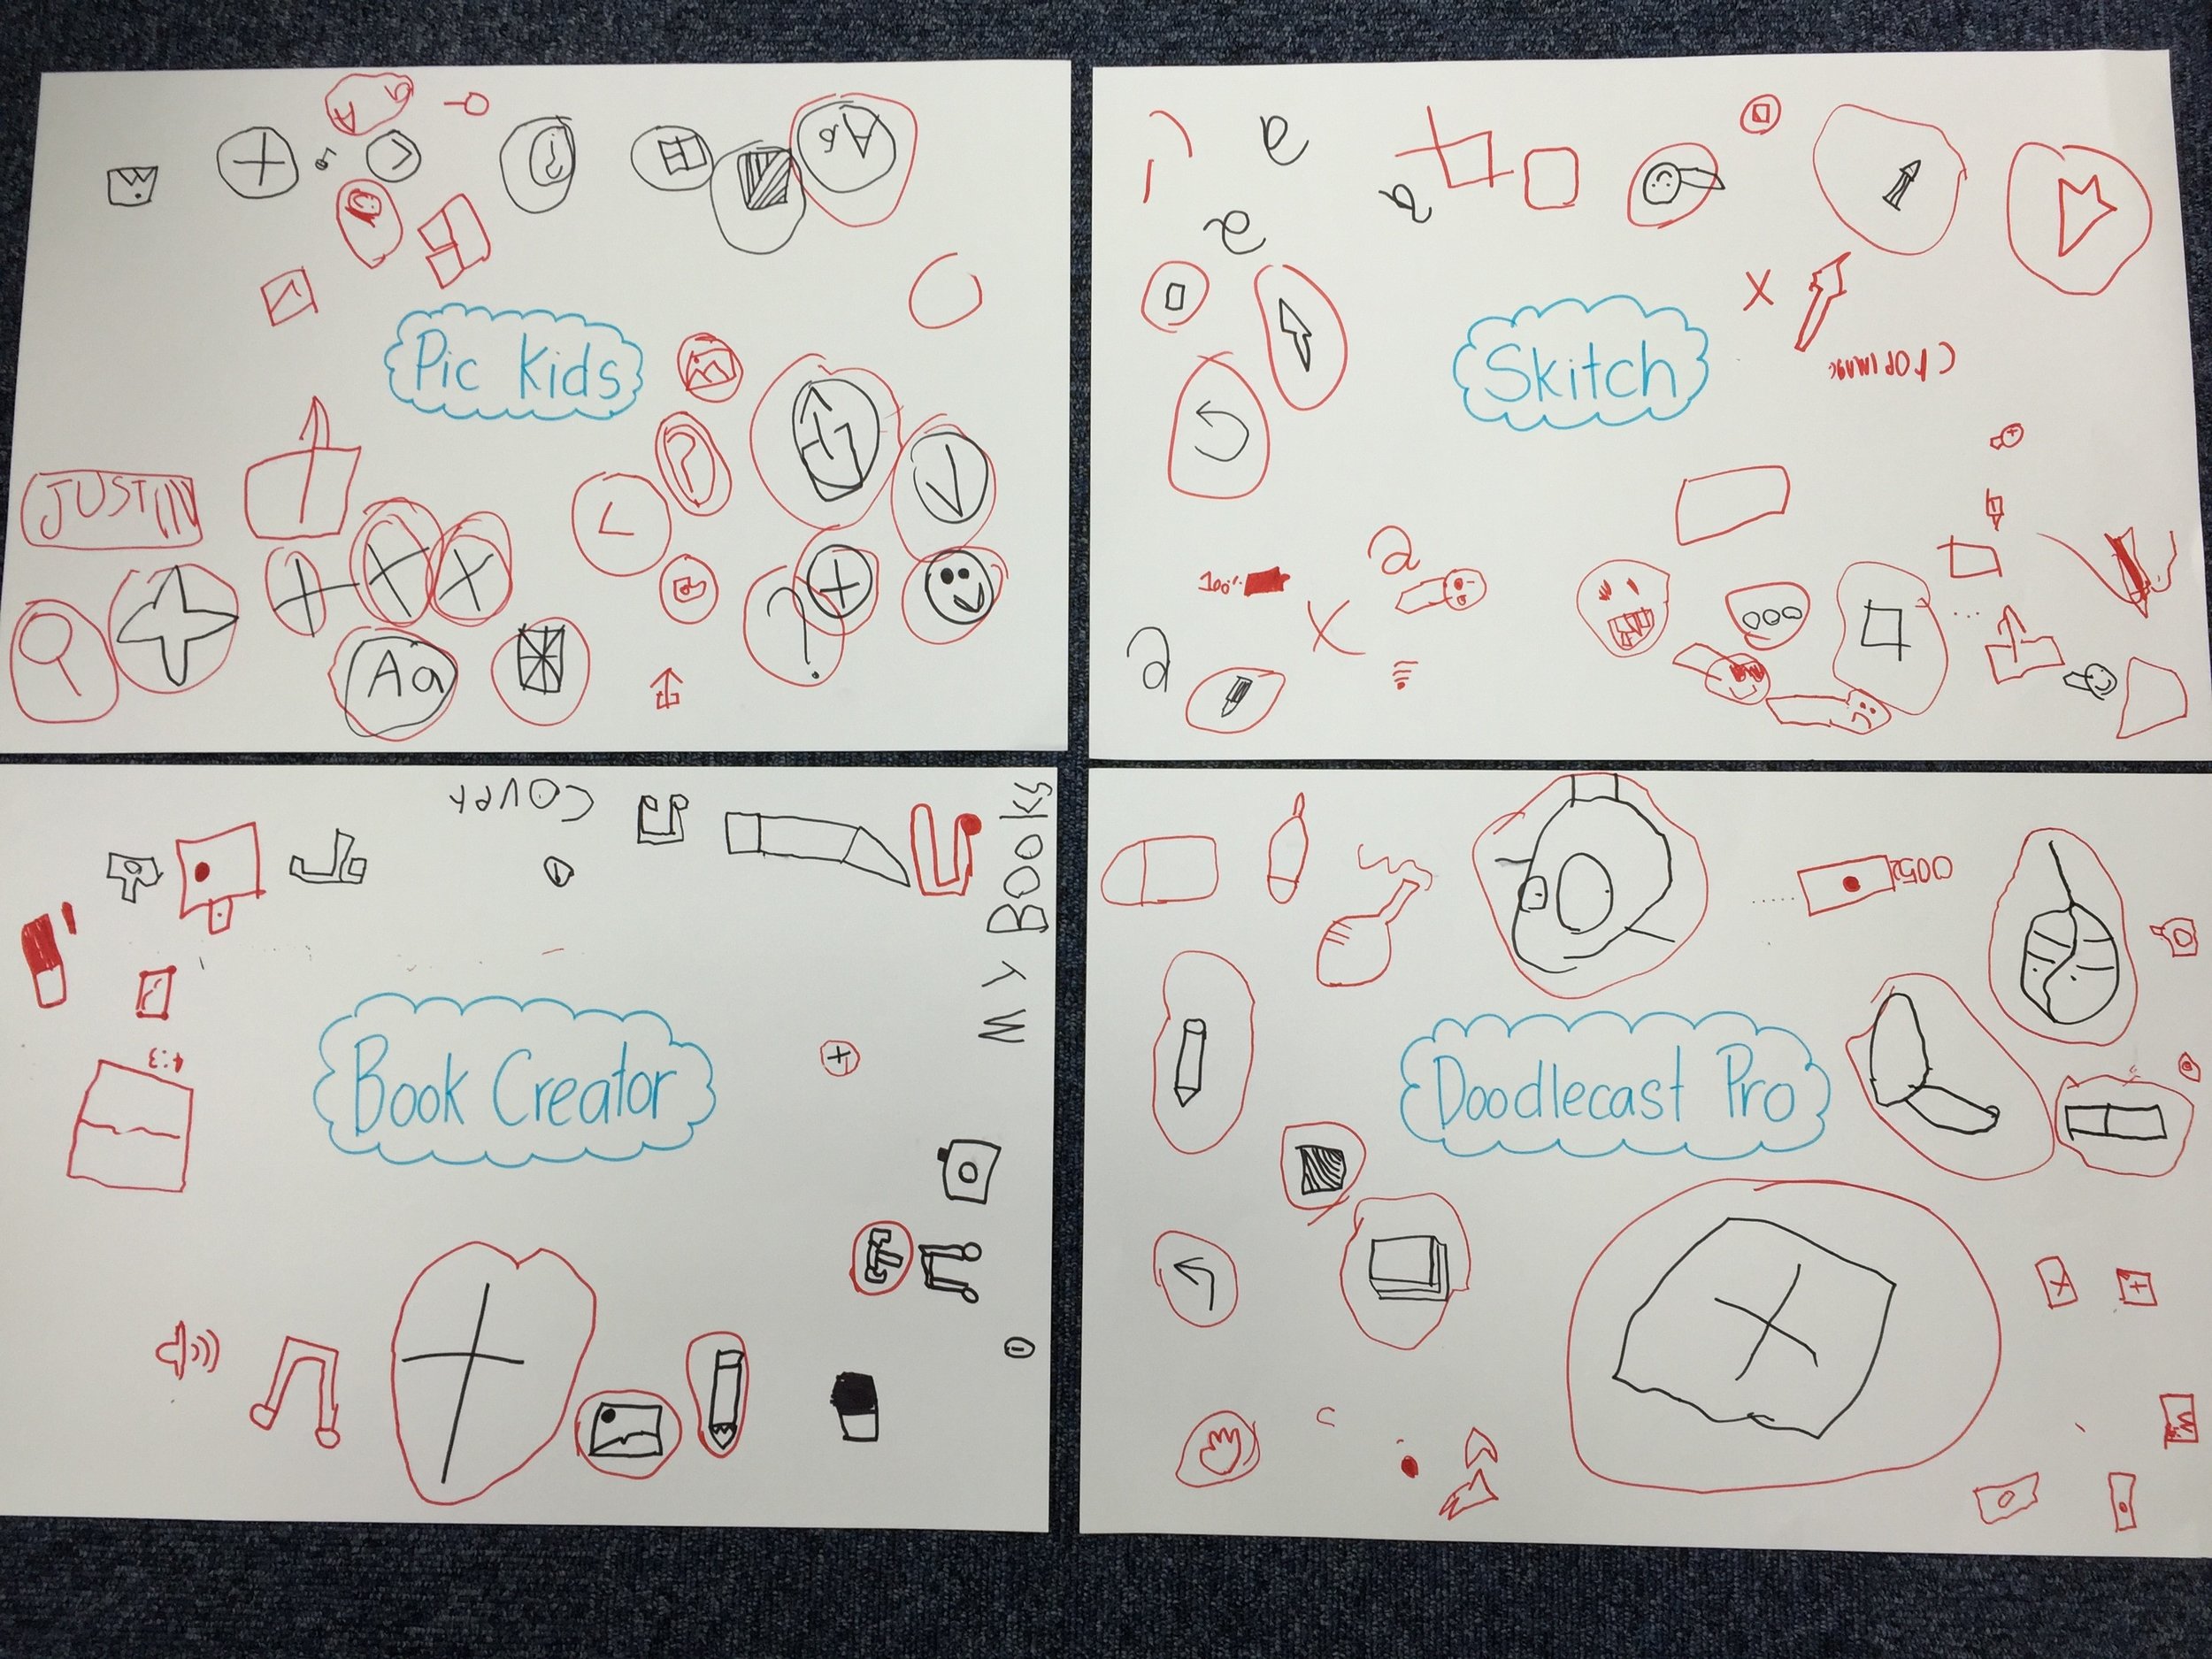
Chalk Talk
At the end of the second rotation, we all came together and I took a photo of all four papers, then inserted it into Doodlecast Pro (any whiteboard app would work for this part). To bring our thoughts together and come to some conclusions. I asked the students to look across papers, and see if they could help me draw lines to make a web of connections. I demonstrated first and then had students come up and point out connections, draw a line on my iPad and record their voice.
Grade 2: Figure Out the Function

By the time students are in second grade, they are generally able to work quite independently on an iPad. However, I never had them notice and think about the function of each icon they come across. I figured that since they were older than the Kindergarten kids, I could give them a little crash course in figuring out icon functions.
I decided I should choose an app that could keep the students discovering independently for at least 20 minutes. It also had to be an app that contained many symbols and icons or students would be done discovering before the 20 minutes was up. So, I decided I could use the Scratch Jr. app and integrate this lesson with some coding!
My teaching point for this lesson was:
Apps have many symbols and icons that all have a meaning or function. Today I want you to figure out those functions by stopping and jotting on post it each time you learn what an icon does.
The rules were:
- Draw/sketch the icon
- Write what the function is
- Stick it on the chart
- If you see the same icon begin to create groups by stacking post its on top of each other
I didn't want students to be making their sticky notes and not making connections when they came up to put their post it on the chart. If they paid attention to what had already been discovered, they could then challenge themselves to find something no one had put up yet!
For the last 20 minutes of the lesson, I brought the class back to the carpet, and we all made a short program together on Scratch Jr. I had students come up and share some of the cool things they had learned. I also had the class decide together which characters would be included in our collaborative piece and what each character would do. I tried to select students who learned things that most of the class did not, so that the rest of the class could learn a few more symbols and how they could use those blocks of code.
After each class I used the Post It Plus app to collect all of their discoveries and posted this to their class blog.